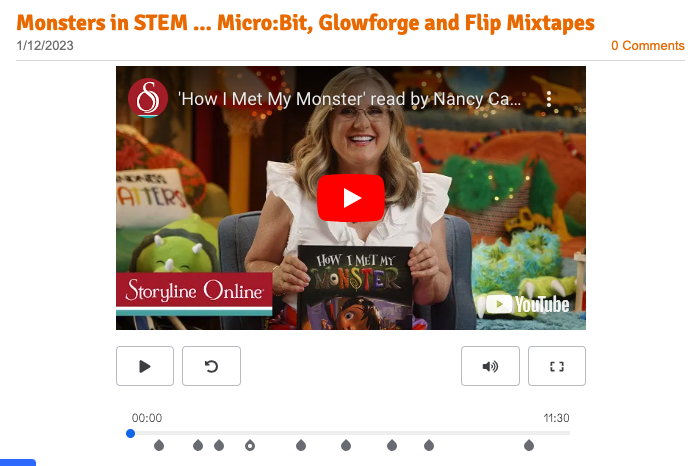
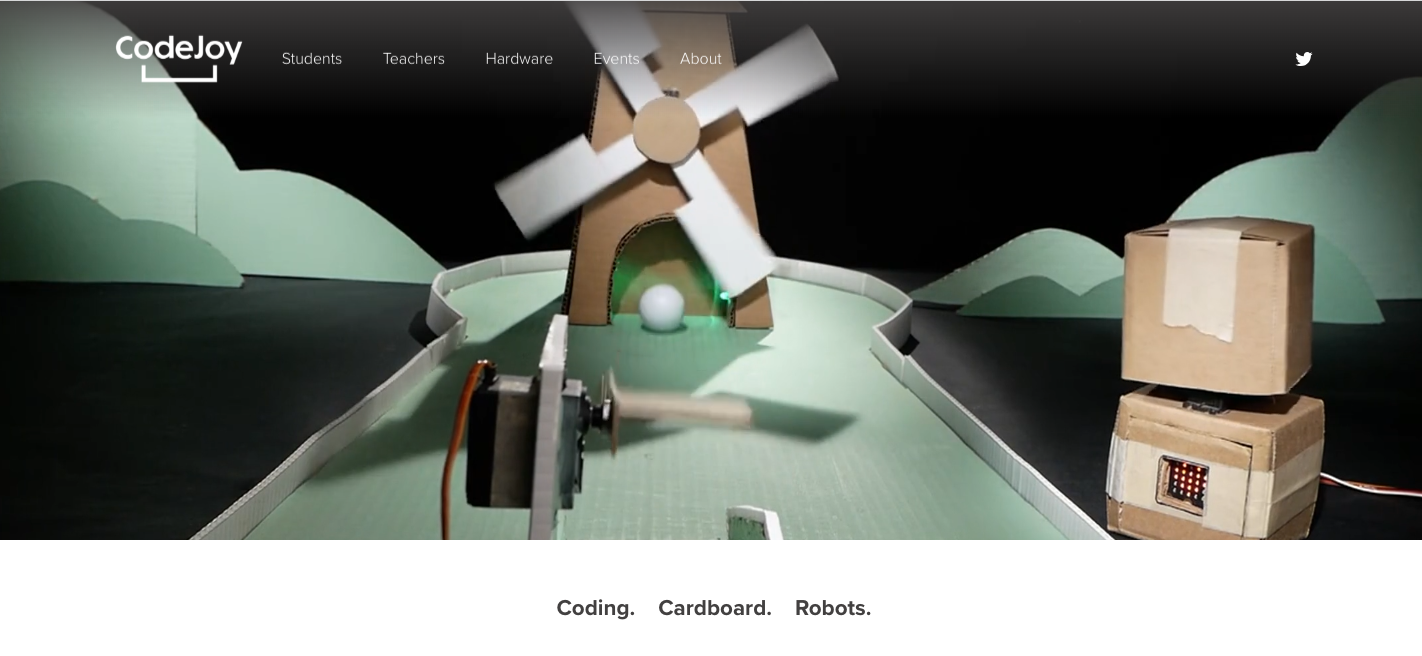
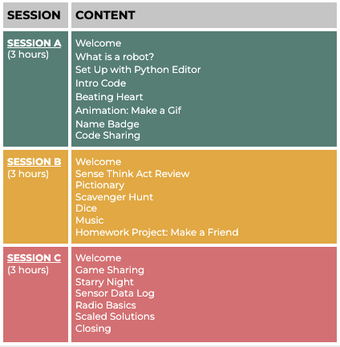
This week designers took their starter projects to the next level and the results were beyond any expectations. Thank you to CodeJoy for the inspiration and starter project as well as the Infosys Pathfinder Summer PD for providing me the opportunity to learn and connect with educators to learn more about creative robotics. Week 1 Blog Post LinkDuring Week 1, designers co-created a windmill starter project. At the beginning of week 2, designers used Flip to view other designs and give feedback and suggestions to other designers of what they might change or add to their designs. |
Our designers debuted their designs with their mentor partners this Friday.
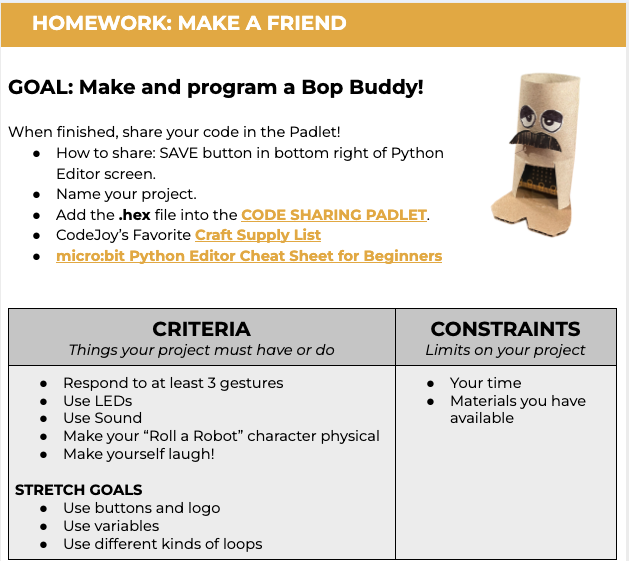
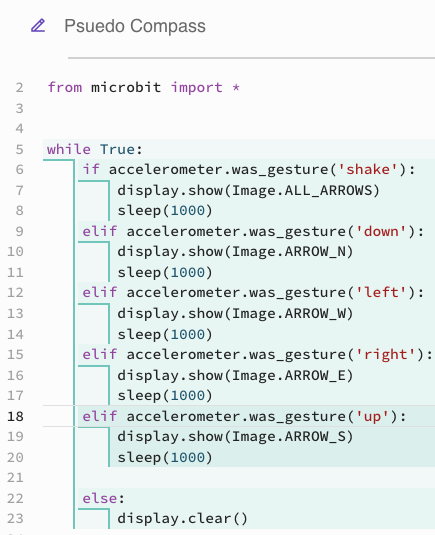
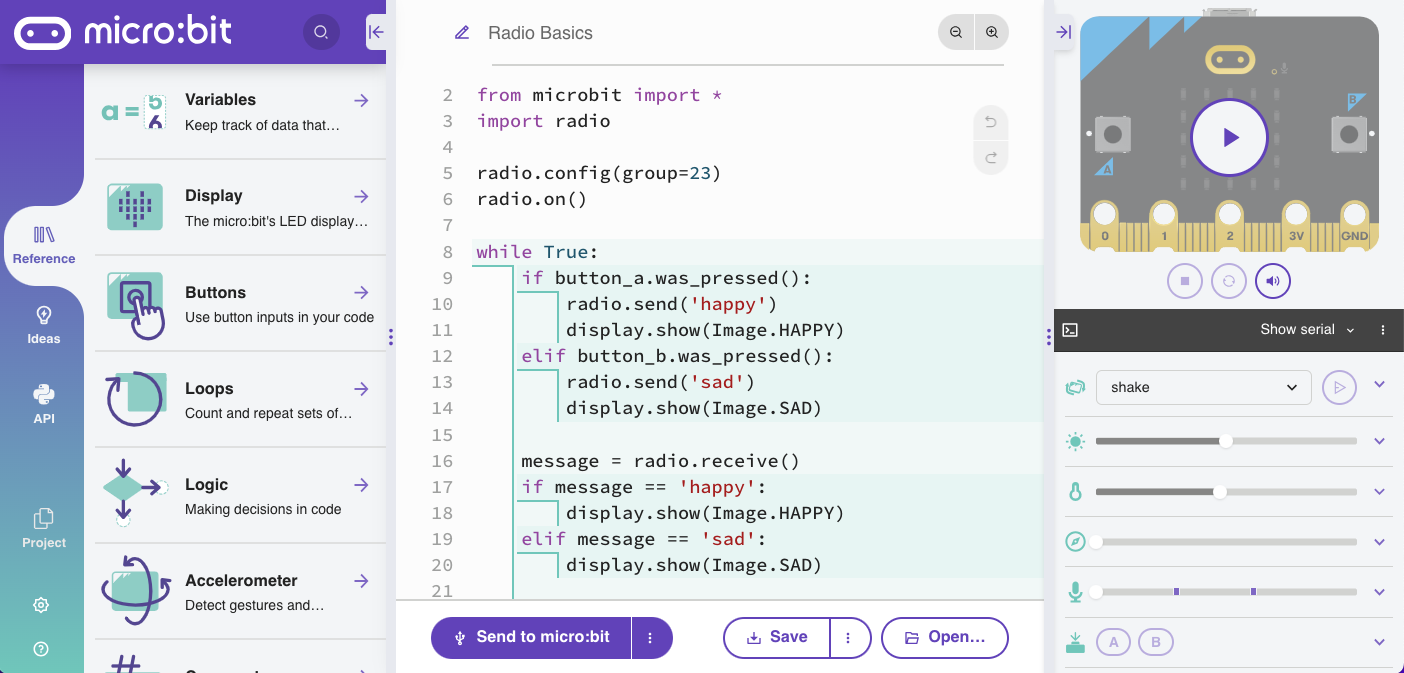
Using several days of designing interlaced with tutorial videos to expand coding options, the goal was to give teams a chance to really reimagine their initial design so that we would not have a mini golf course full of only windmills.
0 Comments
My Design Process
U - Understand the Problem or Process I looked at what I was already doing and decided to improve my How I Met My Monster STEM story learning. I remembered that Kelsey introduced gestures and the accelerometer of the Micro:bit so I knew that I wanted to break up the lesson with specific focuses. I gathered the resources that I had available that could also be used in my classroom. N - Navigate Ideas I love the color orange and I wanted my monster to be an active monster so I decided on creating an exercise monster with my Glowforge cardboard cut monster. I started with decorating my monster with the materials that I had.
Monster Lesson Update
After listening to the story, designers will select their cardboard monster and start to use different materials to design their physical monster.
Starry Night
Sensor Data Logging
We used the micro:bit data logging to find measure temperature, sound, and light in our environment. One thing that was important is the reminder that the temperature sensor is on the back of the micro:bit so if you are holding it in your hand, it could be reading your temperature instead of what you are hoping to be measuring. Radio BasicsIf you get the opportunity to learn with the CodeJoy team, I hope that you will agree with me that it is life-changing PD. The caliber of the PD keeps me engaged, excited, and energized to use with my own designers. I continue to learn both about the micro:bit but also effective ways to bring computational thinking as well as creative computing into my classroom.
PictionaryOur next Python programming challenge was to integrate the LED display to create three images that were triggered by the buttons and logo. I loved this activity because it was a fun way to incorporate diversity of design into a programming and game format. During this activity, we also learned about Logic Trees and how to use this visual to help designers understand what they are programming. Scavenger Hunt
Dice
Pseudo CompassHomework: Make a FriendI am going to dedicate a separate post to this project because I am revamping a previous lesson that I used this project to better reflect the iteration that I plan to use in the classroom. More to come.... I want to start this blog post by saying "Thank You" to Infosys Pathfinders for providing this learning opportunity and to the CodeJoy team of Kelsey, Matt, Amanda Jean, Mike, and Susan. I am truly appreciative of the three days of learning that provided me the bridge to using Python with the Micro:Bit in my classroom. I sit here two weeks before the school year officially starts surrounded by my Micro:Bits trying to process last week's learning. Two years ago, I knew only Code.org as a way to access computer science for my learners. Last summer I stumbled on CodeJoy as part of the Pathfinder's Summer PD learning for teachers. I know this sounds cliche but my life has never quite been the same. This summer I spent many hours with the CodeJoy team learning new ideas and revisiting last year's learnings to strengthen my own teaching. Python with BBC Micro:bit Overview
Session A HighlightsLearning about the Python Editor with Kelsey's introduction was the first step for me to realizing that this is a powerful tool that has been designed to make Python accessible through a well developed reference library that provides a starting point to the world of Python. The autofill feature as well as the drag and drop text based coding starts removed so many of the barriers that I already had with text-based coding. Animation: Making a GIF
Partner Name Tag Design Challenge
So this summer the team, which has now grown to 5 amazing individuals, is offering 3 free all day virtual making and learning opportunities called Make A Thons. I was fortunate enough to participate in most of the first Make A Thon and am looking forward to this Friday. Morning Session
Evening Session
It didn't take long for me to understand why Rudy is so loved in the educational field. His positive approach to learning and sharing makes you feel immediately at ease. I knew that he was pretty amazing based on twitter chatter but I finally was able to experience this first hand.
Breakout Group
I was able to ask questions, learn how to convert temperatures using a function, how to download a data logging project to my Micro:Bit, upload the data to Codap, and manipulate the data. Rudy showed me the importance of live coding when doing a project with students as well as shared other resources to leverage the Micro:Bit and other robotic components like Breakout boards, weather:bit, and DFrobot for even more expansion ideas. Additional ResourcesClick on the above images to access the resources. GearBox Labs is a STEM Education non-profit based in Wisconsin, United States that reaches learners around the country and the world. They publish curriculum, produce learning kits, and provide workshops for students, teachers and self-motivated learners. I was lucky enough to register for two virtual workshops this summer. Having completed the first workshop, I am going to share my experience. Day 1 and 2: Tinkercad Circuits and Arduino
At first I struggled with manipulating both the pieces and the wires in Tinkercad Circuits. Adding text based code when I am still really learning about circuits was a little overwhelming on the first day (breadboards, Arduino Uno, resistors). I was thankful that the PD was only 2 hours because I needed to be able to regroup and come back the following day. The first day I just tried to stay with the group and copy what was being modeled. I was thankful to have multiple screens.
On Day 2, I learned how to copy the code from Tinkercad, open Arduino IDE, and paste a new sketch. I learned that the red words were functions, I learned that you need to go to Tools - board - and select the board. You also need to go to tools - port - modem to send your code to the Arduino. I learned about the Piazo buzzer which sends electric signals through plastic and is a passive buzzer. Active buzzers only make one tone. We also did the potentiometer project to create a LED dimmer control.
On Day 3, Michael Carroll of Scrappy Circuits led us through creating with inexpensive materials to create circuits with our students. Scrappy Circuits has an amazing book as well as website that Michael shares his passion for providing access to all designers with simple inexpensive materials.
The interactive poster challenge was just that ... a challenge for me. I don't like drawing so I really struggled to come up with something to create even though this challenge I could see transferring into any curricular area with ease. I loved watching the Flip videos of the other teachers but it took me several days to complete this challenge. I had to drop several ideas that I had because of my own drawing skills and access to materials at home. I was able to play with the beta of the new poster app that Makey Makey is working on which was fun.
On Day 4, Katie Butzu presented about using different controllers with Makey Makey to support assistive technology. The work that she and Mark Lyons have done in Michigan with Makey Makey and assistive technology was extremely inspiring. Check out CreATive Makers to learn more about their use of Makey Makey in occupational therapy.
As I look back at the first four days of this amazing PD, I realize just how lucky I was that Colleen G. and Infosys Foundation offered this opportunity to teachers.
Day 1
Day 2
My LED Bunny
Dreams by Langston HughesDay 3
After an afternoon of thinking about my robot poetry and working within the time constraints and knowledge constraints, we stared Day 3 sharing our projects in breakout rooms. Day 3 was learning the next level of both the uses of the Hummingbird as well as the resources on the website. The website has so many resources that provide me the next steps of how to use different devices with bluetooth as well as projects. Honestly I can't determine which resource is my favorite - the step by step tutorials, the projects, or the reading list to connect to stories.
My Reflection
This was an exceptional virtual PD. Kelsey's energy and Matt's support in answering questions really made learning something new seem so much easier and doable for both me and my students. I loved how Kelsey introduced the different components and then it was tied to a project. I not only learned a lot about the components and programming the components but also an effective way to introduce these concepts to my students.
I am lucky enough to have CodeJoy with Micro:Bits in July so I will get to work with Kelsey and Matt again. Thank you Pathfinders for providing these opportunities!
Besides the Summer Institute, there are on demand courses for both teachers and students. |
Archives
March 2024
Categories
All
|