I love Twitter for all of the amazing ideas that help inspire me to pose different challenges and see what my designers will do. Some shares connect me to my childhood like Martine Segers post in February - https://x.com/PinkyPepper_/status/1761788359230255269?s=20. This design was posted just as my designers were moving into learning about the Bit:Explorer and different types of servos. |
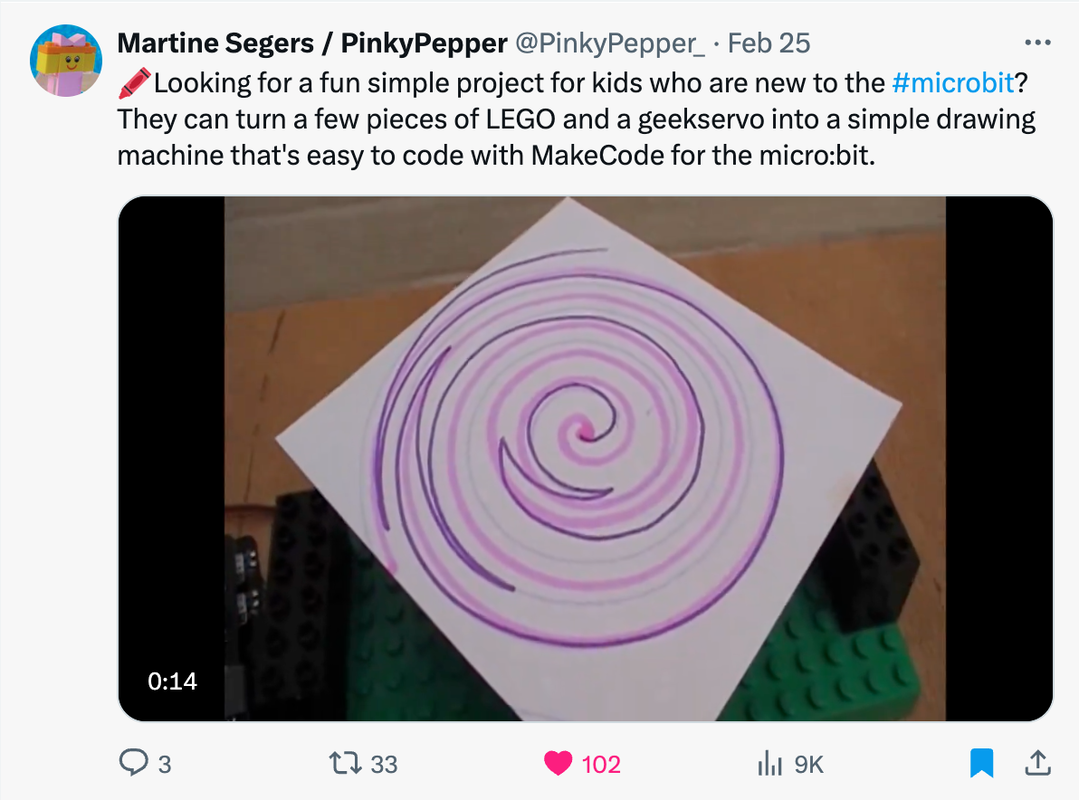
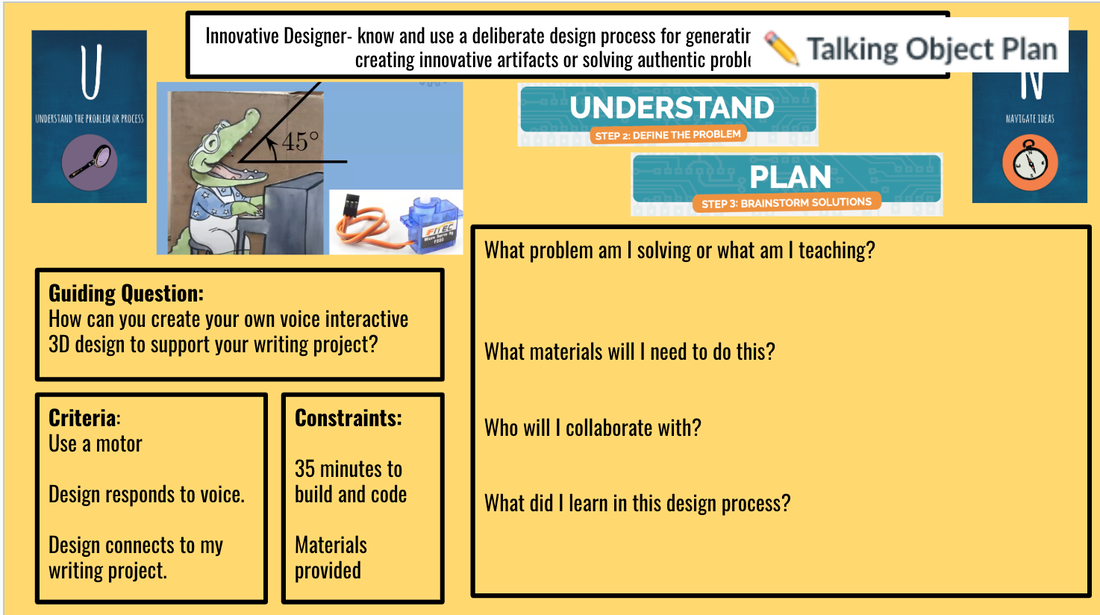
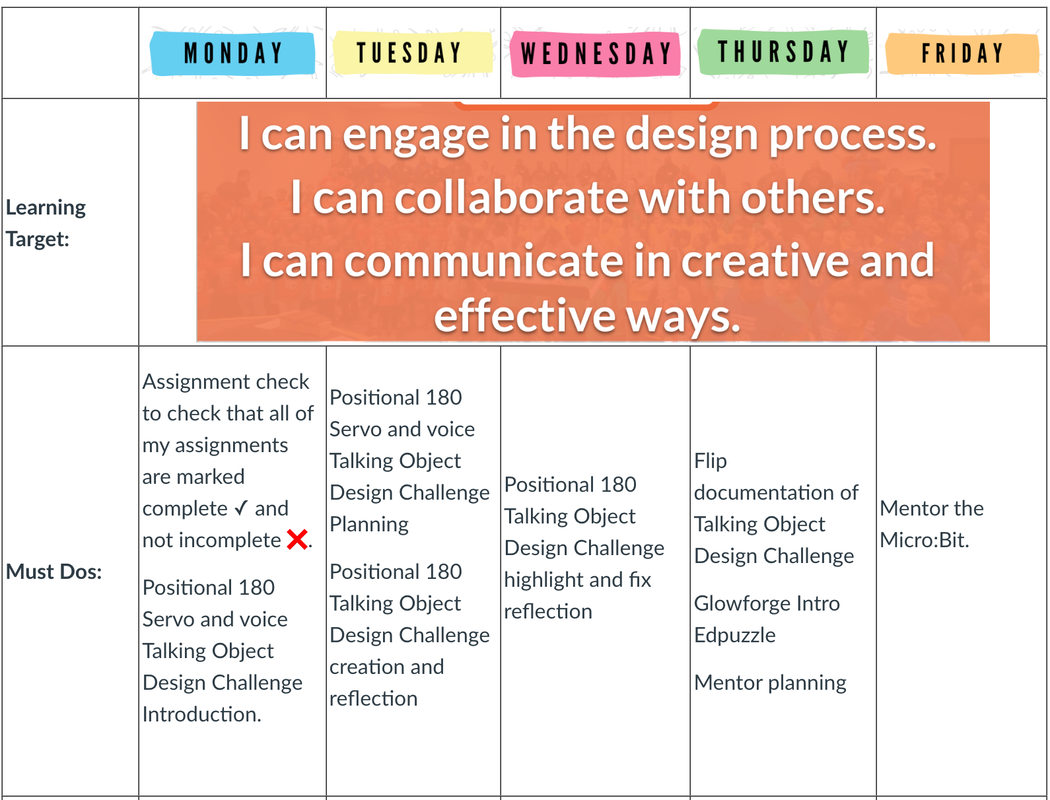
I absolutely love how each designer or designing team took the challenge in a different direction.
0 Comments
This week designers explored the intersection of technology, coding, and creating inspired by Rosie Revere Engineer.
S - Design Thinking StoryOzobot Research
Designers teamed up to research influential woman coders in different industries, create a timeline of important accomplishments, color code the Ozobot path, and record their final research together on Flip.
T - Technology Exploration
Designers learned about how the radio function in the micro:bit works and practiced transporting virtual ducks and more.
E - Engineering Exploration
Designers learned about how servos work. Using the Bit:Explorer and micro:bit, designers coded a rotational servo.
M - Making
Designer were challenged to apply their radio and servo programming skills together.
First IterationsStudent Reflections
LAUNCH of Talking Object in Flip
This project inspired by Cecilia Hillway's presentation at Make: Education Forum this past September was a challenge that required partners to work together both in their code and in their physical design. I'm going to start by showcasing the final product that was created through productive struggle.
Highlight and Fix
Create
Also plugging servos into the Bit:explorer incorrectly were aha moments. Reseting the micro:bit with a battery pack and then adding the micro:bit back to the Bit:explorer was part of the process for some teams who struggled to reach the reset button which is essential with iPads and micro:bits. Of course recognizing that a micro:bit can't be powered by a battery pack and the Bit:explorer at the same time was also an important discovery.
Navigate Ideas
Which code works better? I modeled the code that I had learned and quickly modeled how you can make mistakes. So I showed how both codes worked. No code is the only way to do something. My code has more than its share of room for improvement but it provided a starting point.
Understand
Having never done this project before, the only example that I had was the one that I created. It took me several hours to troubleshoot my design and I quickly realized that it was an important scaffold to show step by step how I created both the base of my physical design and my code.
Ask Questions
What do we need to know about the code? What do we need to know about the physical design? What do we need to know about servos? I used an edpuzzle to start building the understanding of one of the important components of the project.
Look, Listen, and Learn
Introducing the Bit:explorer as well as creating scaffolds for the use of the servo and a sample project built a beginning foundation to understand what we would be doing.
The Week's PlanA few weeks back my donor's choose project for 2 class sets of Bit:explorers was funded and today was the first day of having designers use the Bit:explorer. Preparing the Bit:ExplorerIntroducing the Bit:Explorer to DesignersSo hindsight being 20/20, I should have created an intro video to the bit:explorer instead of just handing them out. Sure I had put a preset program on each of them but I should have known the importance of overviewing a new hardware piece. Here is how I should have introduced the bit:explorer. Servos and Sound Input
Talking Code Tutorial VideoTalking Code TestScaffolding AnglesThanks to the Glowforge, I created a cardboard scaffold for the servo to sit inside. I've included the file below.
|
Archives
April 2024
Categories
All
|